This post may contain affiliate links. If you purchase something through one of these links, I may earn a small commission at no additional cost to you.
I am always flirting with the idea of taking our ceiling fans down and replacing them with pretty light fixtures.
Light fixtures are my weakness. Jewelry? Meh. A pretty chandelier? Swoooooon.
Unfortunately, living without ceiling fans sounds much more appealing in my imaginary house—the one where it is always pleasantly cool, no one leaves shoes in the living room and nothing is made by Fisher-Price.

Here in the real world, ceiling fans are practical. They keep the air moving, make a room more comfortable and can even help with heating and cooling costs. But practical doesn’t have to mean dated, boring or builder-grade.
If your fan still works well, you may not need to replace the entire thing. A few relatively simple changes can give an old ceiling fan a fresh, updated look for much less than the cost of a new fixture.
Here are five easy ways to update an old ceiling fan without replacing it.
Before You Begin
Always turn off the fan and shut off the power at the circuit breaker before removing shades, light kits or other electrical components.
Make sure any replacement light kit, shade or bulb is compatible with your particular ceiling fan. If a project involves wiring—or you aren’t comfortable working with electrical fixtures—call a qualified electrician.
It is always better to be safe than to accidentally turn a ceiling-fan makeover into a much larger home-improvement project.
1. Replace the Glass Shades
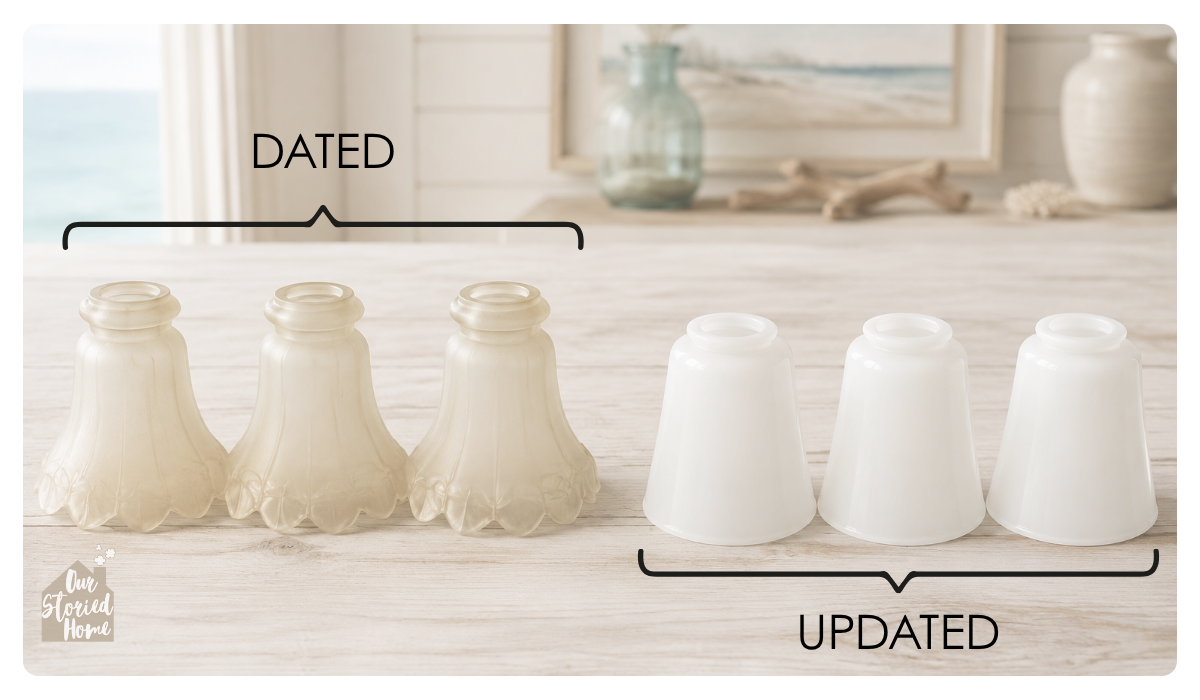
Changing the glass shades may be the quickest way to make an old ceiling fan look newer.
Many older fans have heavily frosted, fluted or tulip-shaped shades that immediately reveal their age. Replacing them with simple clear, seeded, opal or milk-glass shades can dramatically change the fixture without changing the fan itself. These clear cylinder-shaped shades are contemporary and simple.
Before buying replacement shades, remove one of the existing shades and carefully measure the opening that fits into the fixture. Ceiling-fan shades are not all interchangeable, so check both the fitter size and the way the shade attaches.
If you are shopping in person, take an old shade with you. It may look slightly odd sitting in your shopping cart, but it is much less frustrating than getting home with three beautiful shades that don’t fit.
Habitat for Humanity ReStores, thrift stores and architectural salvage shops can also be wonderful sources for inexpensive replacement shades. You may even find vintage shades that give a basic fan far more character.
2. Add a Decorative Light Kit
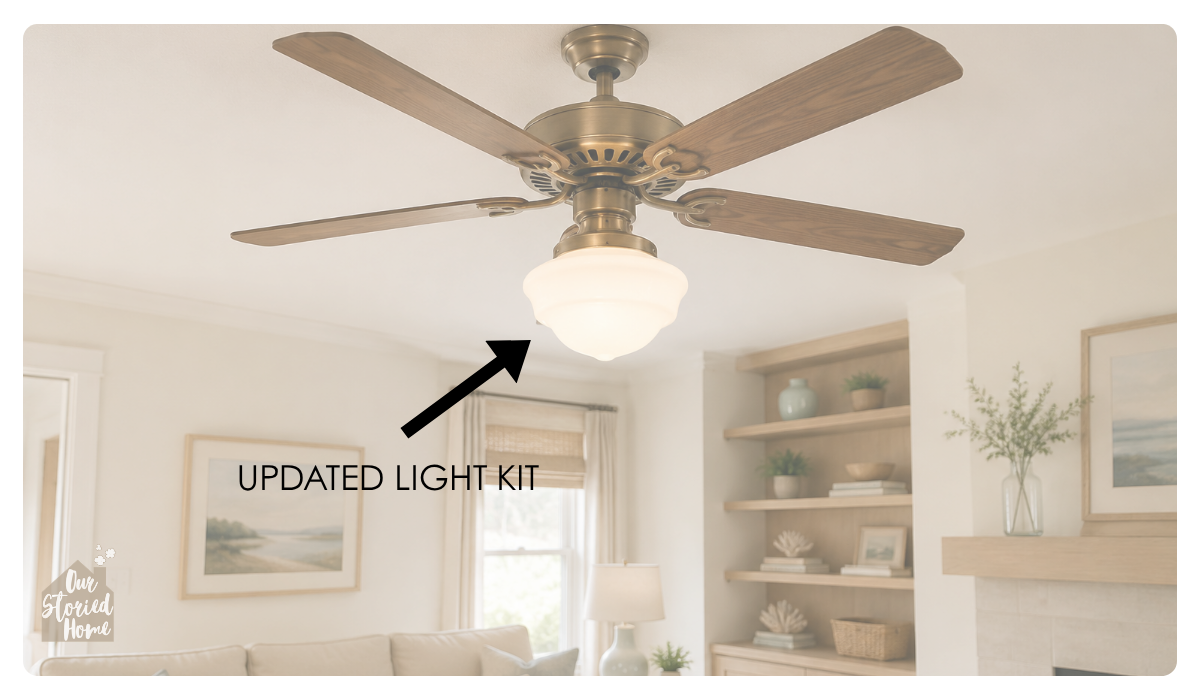
If replacing the shades isn’t enough, consider changing the entire light kit.
Many ceiling fans are designed to accept compatible light kits, including styles that resemble simple flush-mount fixtures, schoolhouse lights and even small chandeliers. A more decorative light can make an ordinary fan feel intentional instead of merely practical.
The original inspiration for this post came from seeing old ceiling fans fitted with chandelier-style lights in a local bakery. I knew the fans themselves weren’t new, but the decorative lights completely changed their appearance.
Before ordering anything, find the manufacturer and model number of your fan. Confirm that the light kit is compatible and follow the manufacturer’s installation instructions.
If you cannot find a compatible decorative kit, a universal ceiling-fan light kit may be an option—but “universal” does not always mean it will fit every fan ever made. Check the dimensions and specifications carefully.
3. Paint or Refinish the Fan Blades
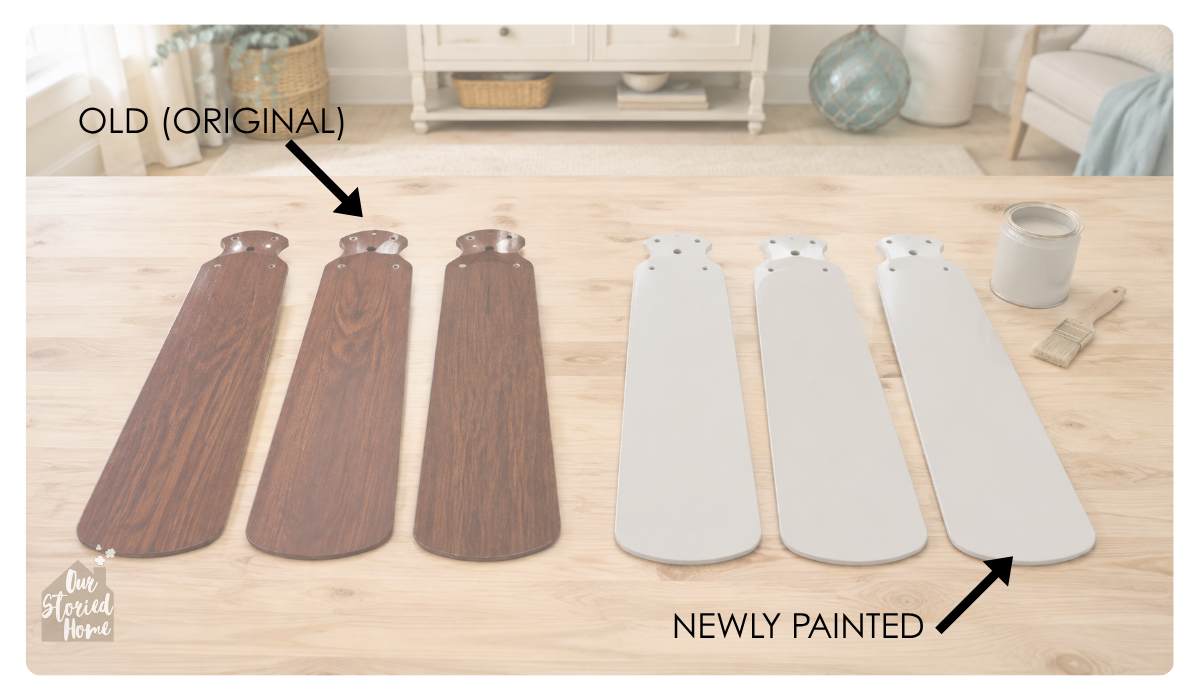
Fan blades take up a lot of visual space, so changing their color can transform the entire fixture.
Dark faux wood, reddish-brown finishes and orange-toned blades can make an otherwise neutral room feel dated. Depending on the material and condition of the blades, you may be able to paint them a soft white, warm greige, muted coastal blue or another color that complements the room.
Remove the blades before painting so you can clean, prepare and finish them evenly. Label their positions and keep all the screws and hardware together for reassembly. Clean each blade with a well-wrung cloth and warm water mixed with a few drops of grease-cutting dish soap. Avoid soaking the blades, particularly around unfinished edges and screw holes, because many are made from MDF or particleboard. Wipe away any soap residue and allow the blades to dry completely before lightly sanding and priming.
Most ceiling-fan blades are made from sealed wood, MDF, veneer or laminate. After cleaning the blades and lightly scuff-sanding the surface, apply one thin coat of a high-adhesion bonding primer, such as Zinsser Bulls Eye 1-2-3 or KILZ Adhesion. Follow with two thin coats of water-based acrylic enamel, furniture or cabinet paint in a satin finish. If your blades are plastic, choose primer and paint specifically labeled for use on plastic. Apply thin, even coats to both sides. Painting only one side or applying an uneven amount of product can affect the balance of the fan.
Do not trim, reshape or add heavy decorative materials to the blades. Changes in blade weight or shape can cause the fan to wobble and may affect how safely it operates.
If the blades are reversible, check the other side before doing anything. You may already have a simpler finish hiding right above your head.
4. Update the Metal Finish
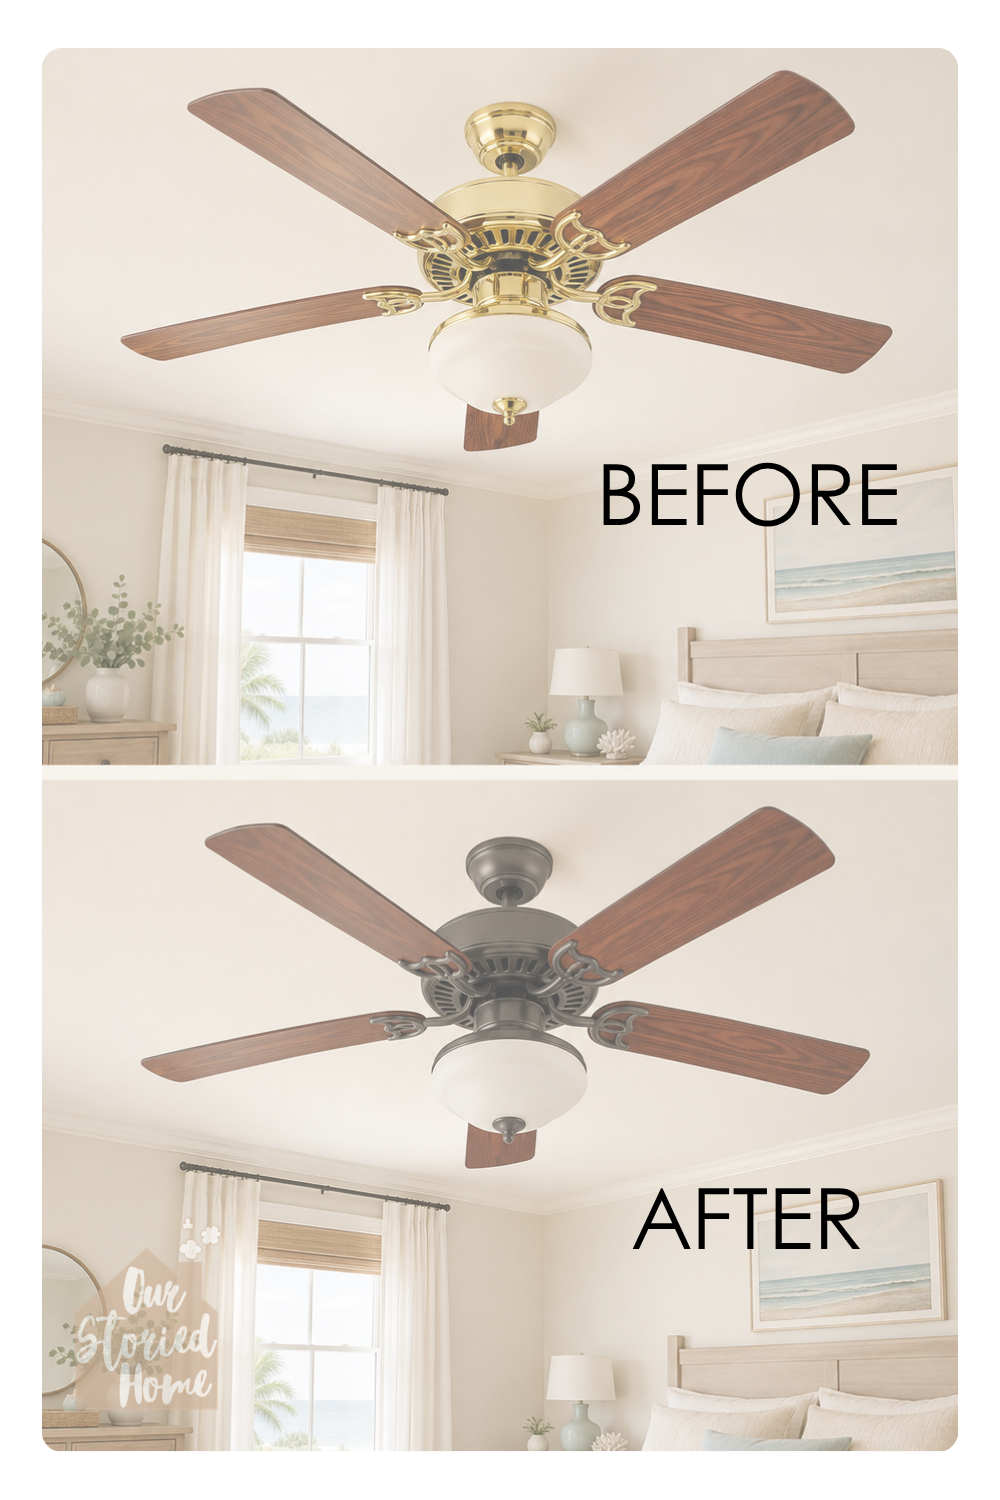
A dated brass, bronze or nickel finish can often be refreshed with paint while keeping the fan’s original character.
Depending on the look you want, you could give the metal components a clean matte-black finish, a softer aged-brass appearance or a light color that helps the fan blend into the ceiling.
This project requires careful preparation. Dust and grease can prevent paint from adhering properly, so clean the parts thoroughly before beginning. Remove any pieces that can be safely detached and protect the motor, vents, wires, ceiling and surrounding room from paint.
Never spray paint a ceiling fan while it is assembled and hanging in the room. Overspray travels much farther than anyone expects—and tiny paint particles inside the motor are not part of the makeover plan.
Use paint made for the material you are covering, apply several light coats and allow everything to cure fully before reassembling the fan.
If you cannot safely remove the components you want to paint, this may be the point when replacing the fan—or asking a professional for help—makes more sense.
5. Change the Bulbs and Pull Chains
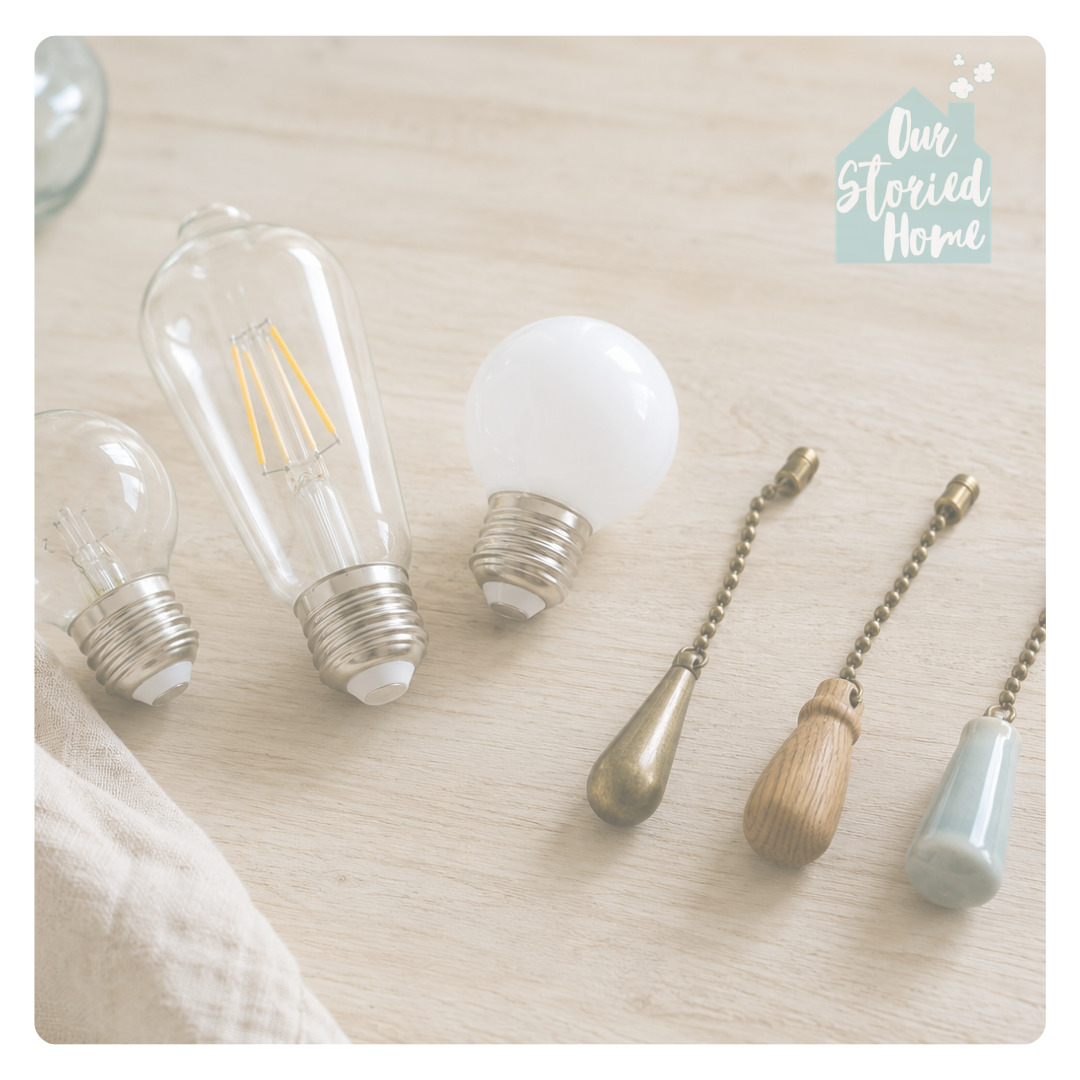
Sometimes the smallest details make an old fan look surprisingly polished.
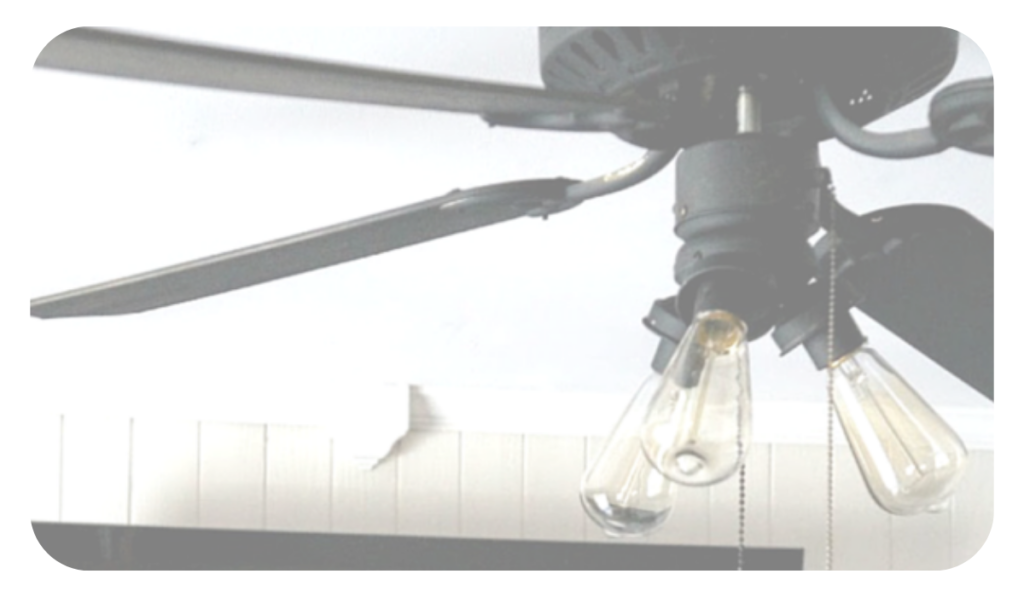
Replace mismatched or overly cool bulbs with compatible bulbs in a consistent color temperature. Warm-white bulbs generally create a softer, cozier feeling, while clear decorative bulbs can work beautifully with open or transparent shades. For a more unique look, try Edison bulbs. Decorative filament-style bulbs can add warmth and vintage character, particularly in industrial, farmhouse or collected traditional rooms.
Check the fan manufacturer’s recommendations for bulb type and maximum wattage. If the bulbs are enclosed by glass, make sure they are approved for use in enclosed fixtures.
Then replace basic pull chains with simple decorative pulls that complement the room. Wood beads can add warmth, while ceramic, glass or understated metal pulls can make the fixture feel more finished.
Just be sure the chains remain easy to identify. There is nothing elegant about repeatedly turning off the light when you meant to change the fan speed.
You May Not Need a New Ceiling Fan
A ceiling fan may never be as romantic as a beautiful chandelier, but replacing a perfectly functional fan isn’t always necessary.
New shades, a decorative light kit, refinished blades, an updated metal finish or even better bulbs and pull chains can help an old fan work with your room instead of against it.
Start with the easiest change and see how the fan looks before doing more. You may discover that one small, affordable update is all it needs.
And if anyone asks whether I’m now a fan of ceiling fans?
I’m sorry. I couldn’t stop myself.