Confession: I get more excited about beautiful light fixtures than jewelry. Pearls? Meh. Diamonds? They’re alright I suppose. A beaded chandelier? Now you’ve got my heart racing.
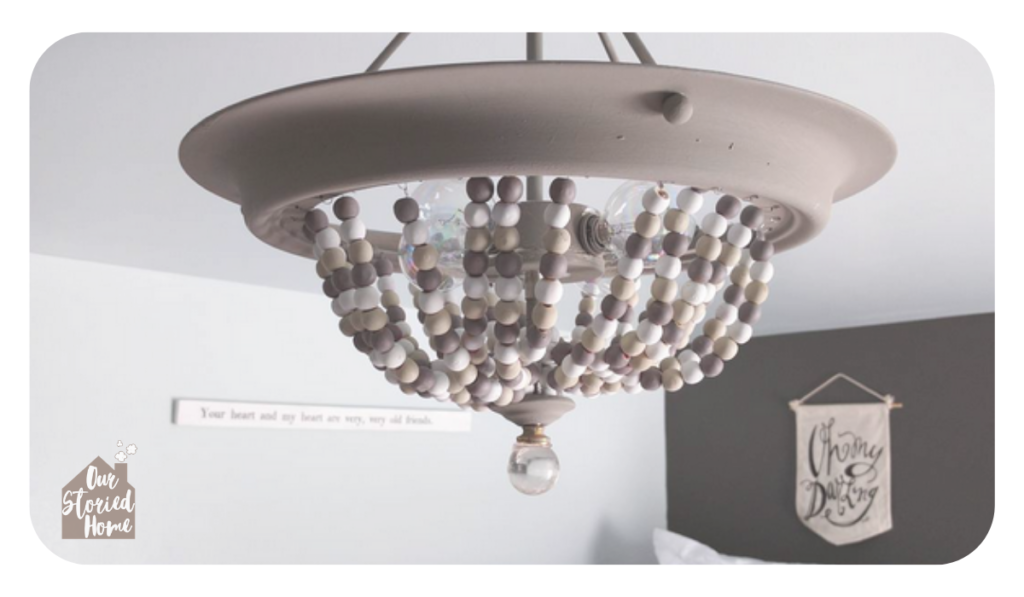
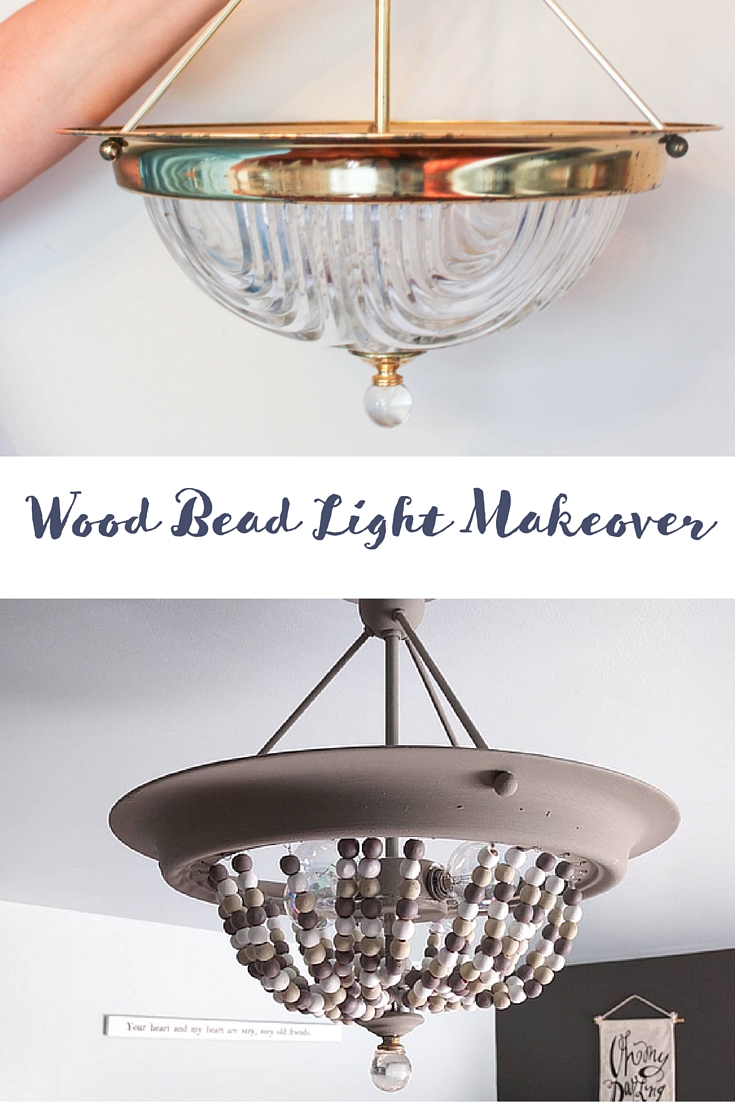
This DIY beaded chandelier started with a $10 thrift store light fixture and a wood bead garland I already had on hand.
This post contains affiliate links. As an Amazon Associate, I earn from qualifying purchases at no additional cost to you.
A few months ago, I stopped by Fable and Flame, one of my very favorite local shops. I like to visit (without kids) and absorb the beautifully-curated collection that owner and self-taught designer James Snowden artfully arranges. Not to go on a tangent here but what I love about the shop is that James (who is very kind) takes these incredible, high-end designs that you’d see in interior design magazines and makes them come to life and he does it with raw, natural talent.
I am so inspired every time I visit. On this particular trip, I fell hard for a beaded chandelier.
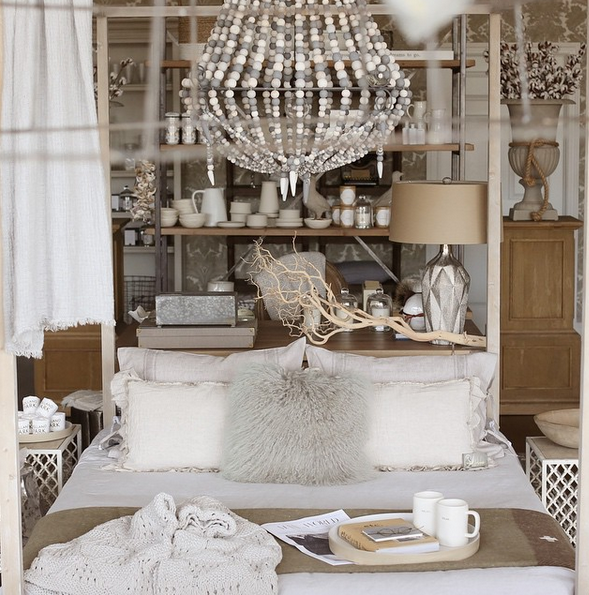
While I always try to leave the shop with a little something (I have a serious weakness for Sugarboo Designs) I knew this chandelier wasn’t going to work for my budget and would have to end up on my “make” rather than “take” list.
I started pricing out the beads and was shocked that it was going to cost me at least $150 in just beads. That wouldn’t be terrible if I had plenty of time to make it happen but in this case, I had to figure in my time. I have a one-year-old; if I was going to spend that money plus more for the lighting elements, it wasn’t going to be on a time-intensive project that I’d have to worry about my toddler choking on. No, I’d just spend the money on a new light. Would it be beaded and glorious? No, but you have to consider your time in the cost of your DIY projects and this particular project was looking outside of both my wallet and time budget.
I had just about given up on my light when I came across a box of old Christmas decorations in storage that had bags and bags of wood bead garland I bought at a yard sale years ago. On a hunch, I pulled a drop cloth out into the yard, laid the garland out and used spray chalk paint to paint the beads. To my surprise, it totally worked! After a trip to my local Restore, where I found a $10 light to use as my base, I was ready.
Want to make one, too? Awesome!
Supplies for a DIY Beaded Chandelier
Krylon Chalky Finish Paint in Mink *
Krylon Chalky Finish Paint in Putty
Krylon Spray Chalky Finish Paint in Classic White
3 strands of beaded garland
Semi-flush mount light (try yard sales and your Restore location)
Drill
Wire cutter
Jewelry wire
Crimp beads
Bead crimper pliers
I used chalky-finish spray paint because I loved the soft, matte look, but don’t feel like you need to hunt it down or pay a premium for it. A flat or matte spray paint would work beautifully, or you can use acrylic craft paint on the wood beads if you already have some on hand.
How to Make a DIY Beaded Chandelier
The light I bought was a semi-flush mount, boob-light-looking fixture. To get a similar look, you’ll need a light with a large round ring and a pole down the middle. One of those builder-basic flush-mount lights (yes, the ones everyone calls boob lights) would work, too. The important thing is having two places to connect the strands of beads.
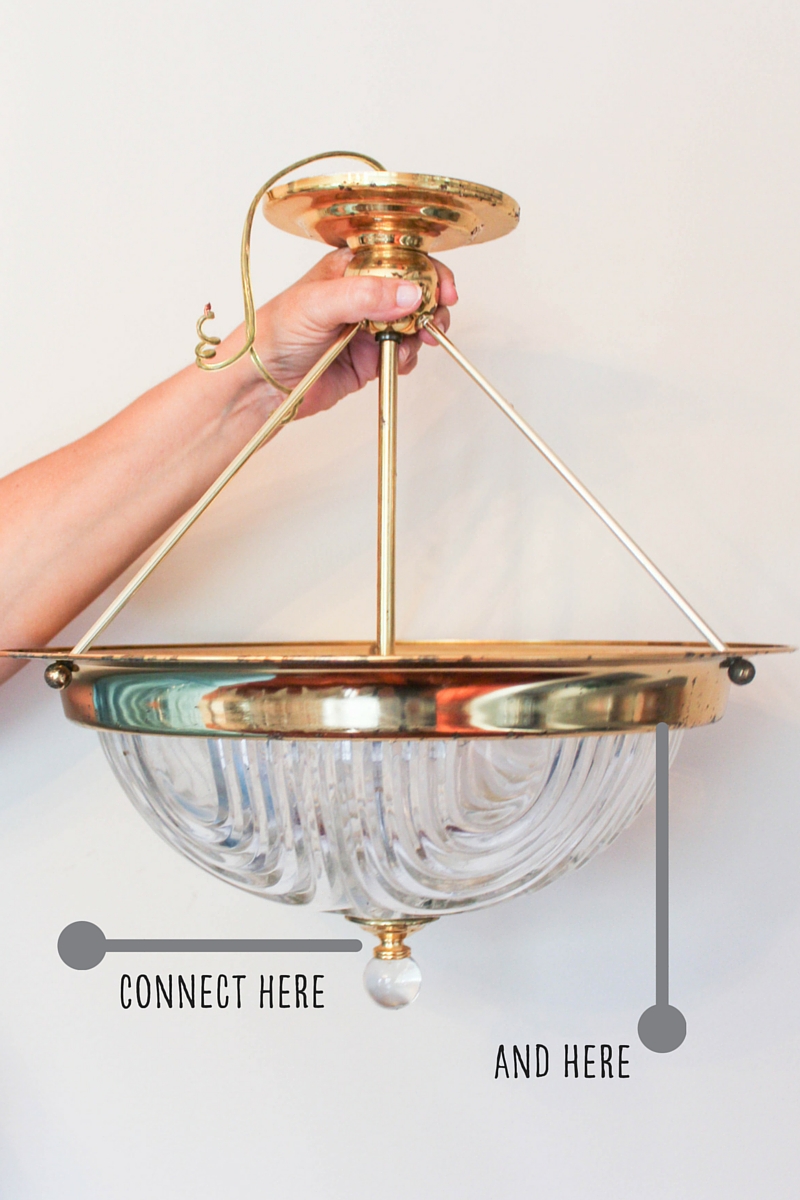
With most lights like these, the glass bowl comes out as you disassemble the fixture. You won’t need it.
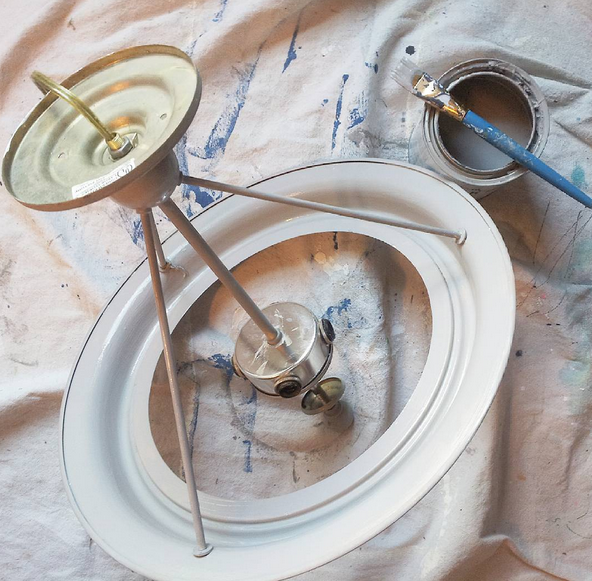
You could use the chalky spray paint to paint the fixture or hand-paint it like I did. I had Annie Sloan French Linen and liked the subtle color difference between that and the beads. I finished it with a few coats of clear wax with a torn white t-shirt (my favorite chalk paint hack) so it wouldn’t get scratched up as I was doing the bead work.
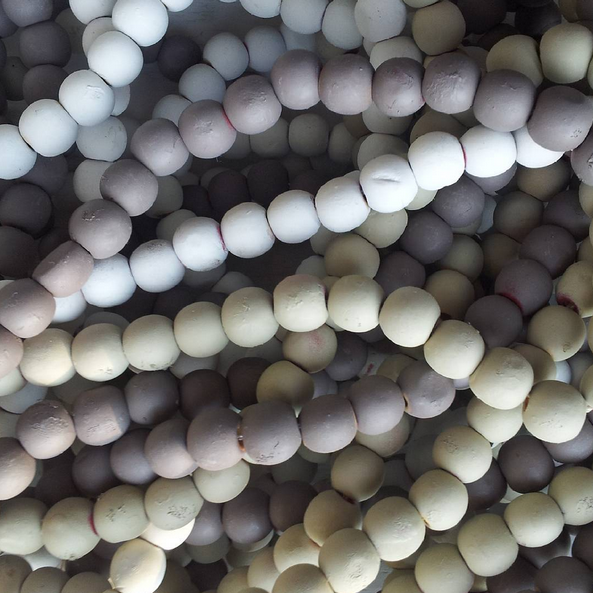
To create the beads, pick a pretty day and spread a drop cloth out in your yard. You could buy these new or just watch yard sales this spring. You’re likely to pick the beads up for next to nothing at a yard sale! I simply spread the garland out, sprayed and then let the paint dry. Then I rotated the garland and sprayed some more until I had all of the beads painted. Super-easy. Once the paint was dry, I snipped the string and sorted the beads into three bins based on color.
Next, I drilled holes around the rim of the light then got to work stringing the beads.
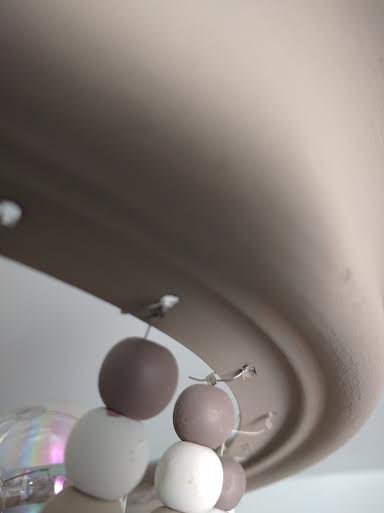
Make sure you cut the wire a little longer than you think you’ll need so you have plenty of room to pull it through the hole and use a crimp bead to secure it from point a to point b. If you’ve never used a crimping tool before to make jewelry, it’s so easy. Here’s how I did this:
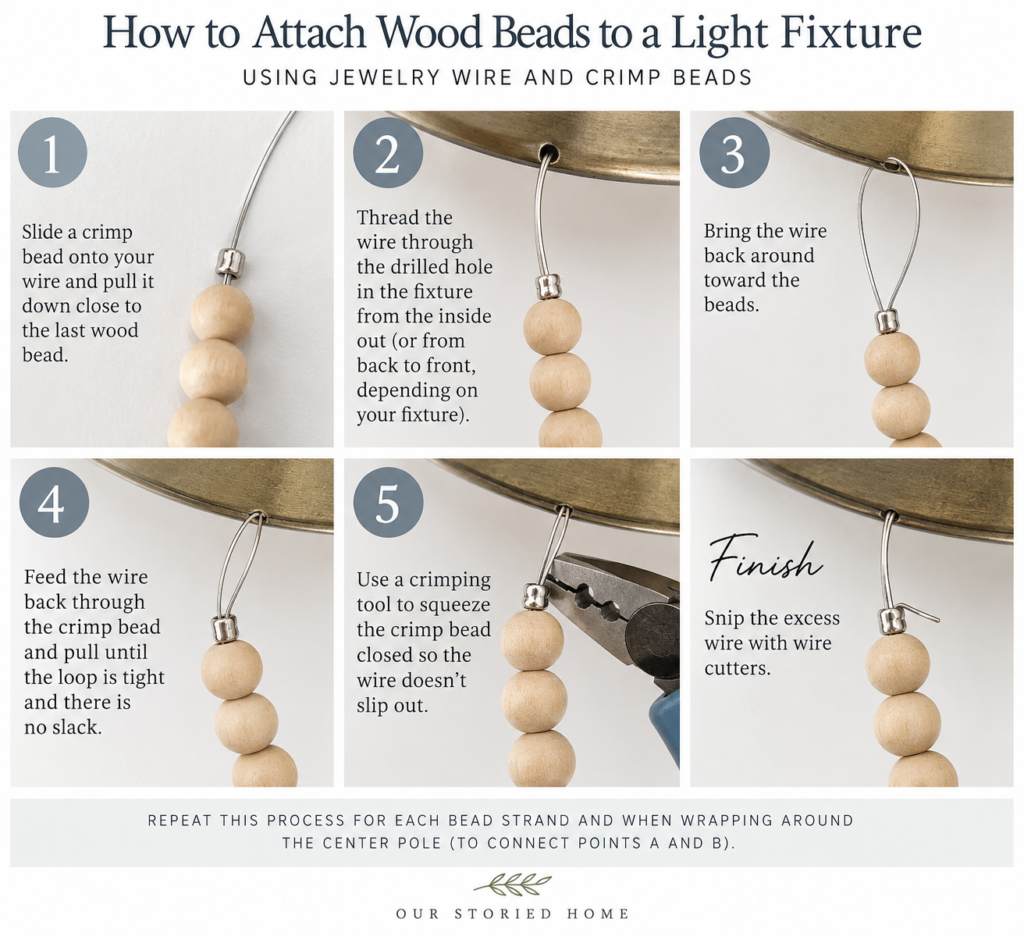
Once you have the wire pulled back through the crimp bead with no slack, take the crimping tool and squeeze the crimp bead closed so the wire doesn’t slip out then snip the excess.
You will repeat this process when you wrap the string of beads around the center pole to connect points a and b.
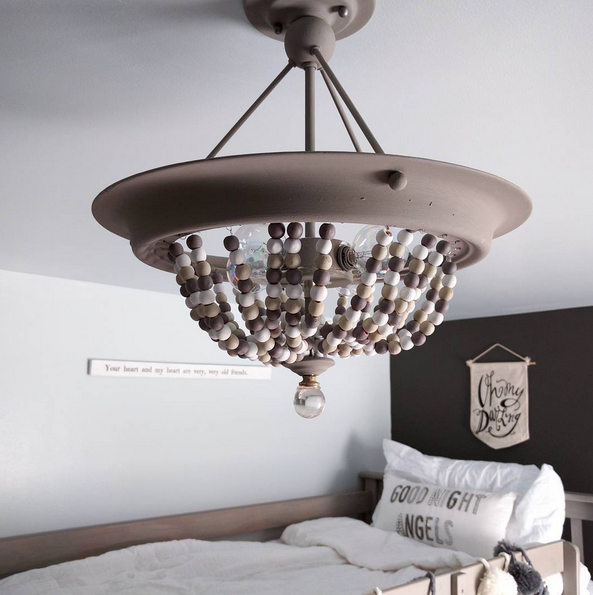
I finished this (and most of a bag of Boom Chicka Pop) in about the time it would take to watch a movie. Once everything was beaded, I took my fingers and straightened out the strands then screwed the finial back on.
And there you have it, friends. A easy way to make a boob-light less…boob-like. Have a great weekend!