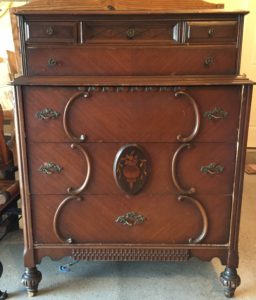
 My brother called me and said a friend of his was wanting to ditch a chest of drawers and then he followed his text with a photo. Hell, YES! The chest arrived and I stared at it. It was beautiful, but looked like it had maybe had a hard life over the years. I had no idea what to do with it. I was probably going to flip it because I have no room for it. I had Amanda take a look at it and she said without hesitation, “Oh, we’ll chalk paint it.” Really? All of it?
Thankfully we didn’t paint the whole thing with chalk paint. We went and picked out a color of chalk paint I liked, that we thought other people would like as well, a light grayish blue. At Lowe’s I took a can of base to the counter and showed them what color I wanted based on the brochure that was close by.
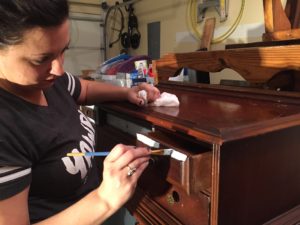 Amanda must have had a vision because she went to work. She said there was no prep -work involved because we were using chalk paint. She asked for a smaller brush and painted only certain parts of the chest, “highlighting” it for lack of a better word. I thought it was beautiful. Amanda did the first coat and left and I thought a second coat was in order. Amanda has a much steadier hand than I do. I’m a taper. I have to use tape. I always use the green Frog Tape. So I carefully followed lines and got the tape where I needed it. For me that was a game changer. Made it so much easier for me. The chalk paint was a little thicker than what I am used to, so took an adjustment.

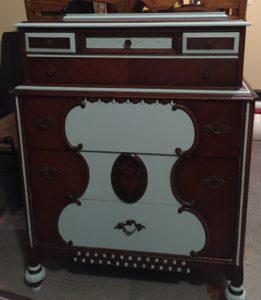
After finishing the second coat, I decided we needed to add just a little bit more, so I did that as well. I allowed the chalk paint to dry for 24 hours, but only because I didn’t have time prior to that. I used Annie Sloan’s chalk wax and used a soft rag to apply. It came with easy to follow instructions (which I always appreciate). I did two coats and was super happy with the finished product. I really enjoyed applying the wax. It was a little therapeutic for me. I am hoping this piece of furniture goes to a good home and gets all the love it deserves.





2 Responses
Oh my gosh! I’m using chalk paint tomorrow for the first time too! I bought a buffet for $50 and I can’t wait – you make it look easy, what a relief!! Your piece looks beautiful! 😊
Thank you so much! It really was easy (I can say this because I had a pro helping me!). I plan on doing MANY more projects in the future so I will hopefully be learning more as I go. I wish you well on your project! Send us a photo when you’re finished and tell us how your experience went!